This post is sponsored by Lowe’s
So happy to have my sister Andrea Ahedo—our head of visual media—share her backyard deck before & after with us!
Last summer, we noticed our deck was showing its age. Even when we bought the house three years ago, we knew it was only a matter of time until that deck really deteriorated. Well, one day, our six-year-old son’s foot went right through a rotten plank! Thank goodness he was wearing socks! We immediately taped it off as a hazard and told the neighborhood kids to steer clear.
Soon after, Chris visited and, with his typical straightforwardness, said, “Decks are so easy to DIY; it’s just a rectangle!” I had been planning to simply replace some planks, but Chris pointed out the underlying rot. He suggested we tear it down completely and rethink how we wanted to use the space, emphasizing that we could make it anything we envisioned. That’s when we decided to extend the deck the entire length of the house.

Shop Andi’s Deck
Materials List & Costs
Thankfully, Chris offered to help us build it. His biggest contribution, besides his initial assessment and walking us through some design decisions, was providing Lowe’s links for every single item we’d need – from lumber and screws to light caps. For very novice DIYers like us, this was a huge help: We could just add everything to our cart. We chose wood over Trex or composite primarily for the price and secondarily because it doesn’t get as hot.
This is what Chris told us to get for our 34.5-foot wide by 16-foot deep deck:
Grand total: $4,785.12
Lowe’s made it incredibly convenient by delivering everything, right down to the screws, to our driveway within about 10 days. We don’t have a pickup truck, and even if we did, there was so much material… I’ll take the convenience every time! It was also easy to return any extra lumber and get our money back (whew).


Solar LED Umbrella | Dining Table | Fire Pit | Solar Deck Lights
Deck Demolition & A Close Call with Staining
Chris and David dedicated almost the entire month of November to the build, working whenever they had a free Saturday, morning, or afternoon. David handled the demolition back in June, so we truly started from scratch!
Afterwards, there were many opinions on how long to wait before staining. We initially thought the next week would be fine, but we learned about the water test for real wood: If water pools on top, the wood isn’t ready; it needs to soak in.
Even though we did the water test, when we got quotes from different stainers, they all agreed that the end of March was too soon, suggesting 5-6 months was better. So, we waited through pollen season and the rainy spring, letting the backyard plants fill in.

The stain I originally chose was “Redwood” by Cabot, a solid acrylic. The sheer number of stain options can be overwhelming. I wasn’t concerned with seeing the wood grain; I wanted a painted look. I selected “New Redwood” online based on a picture that showed a warm brownish square and ordered five gallons (that was around $280).
When the stainers started applying it, about 30 minutes and two banisters in, I texted Julia a picture, saying I felt a little uneasy as it looked quite red to me. Her immediate response was, “That’s very red! How did you choose this color?!” I sheepishly admitted it was based on an online image. She urged me to tell the stainers to pause so we could regroup, which they understandingly did. They were willing to wait for a switch if I ran out to get it really quickly.

Julia immediately began searching online for another solid acrylic option. To alleviate the stress, she asked if I’d consider a lighter color, suggesting “Acorn,” also by Cabot and available in the solid acrylic stain. I received her text on my way to Lowe’s. They mixed the gallons right away.
Because it was acrylic paint, they said we were lucky it wasn’t a transparent oil stain, which would have been impossible to fix. Acrylic dries quickly, which I appreciated, and it’s also super weather-resistant, durable, and heat-resistant. The stainers started repainting over the red, and the relief was immediate!

Seeing the red, I had panicked, worrying about how it would coordinate with the outdoor rug, blue umbrella, and teak furniture. They finished the repainting by 6:30 p.m., after starting at 11 a.m., completing one coat in a day. They were impressed with the quality of the Cabot stain, noting that it only needed one coat.


Acrylic Stain + Sealer
Our Layout and Furniture Finds
When it came to setting up the porch furniture, I was at a standstill because the deck was so much longer! Julia reminded me of our long, rectangular basement family room in our old house, where it was hard to define a focal point for the TV. Her advice then had been to split up the room into sections with different purposes. She suggested dividing our new deck into three distinct zones.

Planter | Weber Pellet Grill | Kettle Grill | Outdoor Kitchen Island
My vision included an outdoor kitchen that felt more substantial than just a grill, a dining area for entertaining (one of my favorite things), and a cozy seating area centered around a fire element. We found everything at Lowe’s, which made it really easy!
The outdoor kitchen was inspired by Chris & Julia’s setup, but we needed a mini version. We knew we wanted a countertop for food prep. And we’ve had an Ooni pizza oven for four years but hadn’t used it much because we lacked a dedicated table. We found an extra stainless steel grill cart to place the Ooni on, and now it’s ready to be put to use for outdoor entertaining!

Rolling Grill Cart | Pizza Oven | Faux Cedar Plant

Solar Post Cap Lights | Outdoor Kitchen Island
We also upgraded David’s grill – his dream grill with Bluetooth connectivity for his phone, perfect for smoking meats and Texas BBQ. He already had a charcoal grill, but this new one was his major deck upgrade!

Planter | Pellet Grill
The layout quickly fell into place. We decided to position the outdoor kitchen closest to the back door for easy access. The dining area would be in the middle, adjacent to the kitchen, and the living room area would be nestled in the corner.
Finding the Perfect Pieces
When I envisioned the deck, I wanted a resort-like feel with lighter colors. I created a Pinterest board filled with dining and living room sets, and Julie quickly helped me narrow down the choices. She loved the teak living room set, which is actually a deep daybed perfect for tall people. Everything we selected has a lighter tone and feels elevated. Julie also chose a navy umbrella, explaining that a lighter color would look washed out against the other light tones, while navy feels classic.

Cantilevered Umbrella | Polywood Dining Set
The umbrella is a major conversation starter; people can’t believe it’s solar-powered with lights inside! It has a simple on/off button. I was initially worried about the light temperature, but it’s perfect – a subtle glow that’s great for mixing with candles.
The polywood dining table is a standout piece. Julie helped me pick this one for the tone-on-tone look! It’s made of composite Polywood wood and is surprisingly heavy, which speaks to its substantial quality and makes it feel very sturdy and gorgeous. I was so happy with it – Lowe’s offered assembly, which we opted for given the daunting task of assembling eight chairs and large table. I left on installation day, and when I returned, it was all set up. Seeing that the table was almost the same color as the deck brought me happy tears (I was so relieved we had changed the deck color)!

Dinnerware | Highball Glasses
For anyone wondering, our fireplace doesn’t have a chimney, so the aluminum thing on the side of the house is a fan. Chris thoughtfully built a structure around it to prevent it from sticking out in the walkway (you can see it to the right of the storage box in the photo below).

Planter | Deck Box | Cantilevered Umbrella
Another favorite feature is the solar floor lamp—it looks like an indoor lamp, it’s so chic! It also has an on/off button and truly makes the living room section feel like an extension of our indoor space. It provides an extra layer of ambiance besides the fire pit!

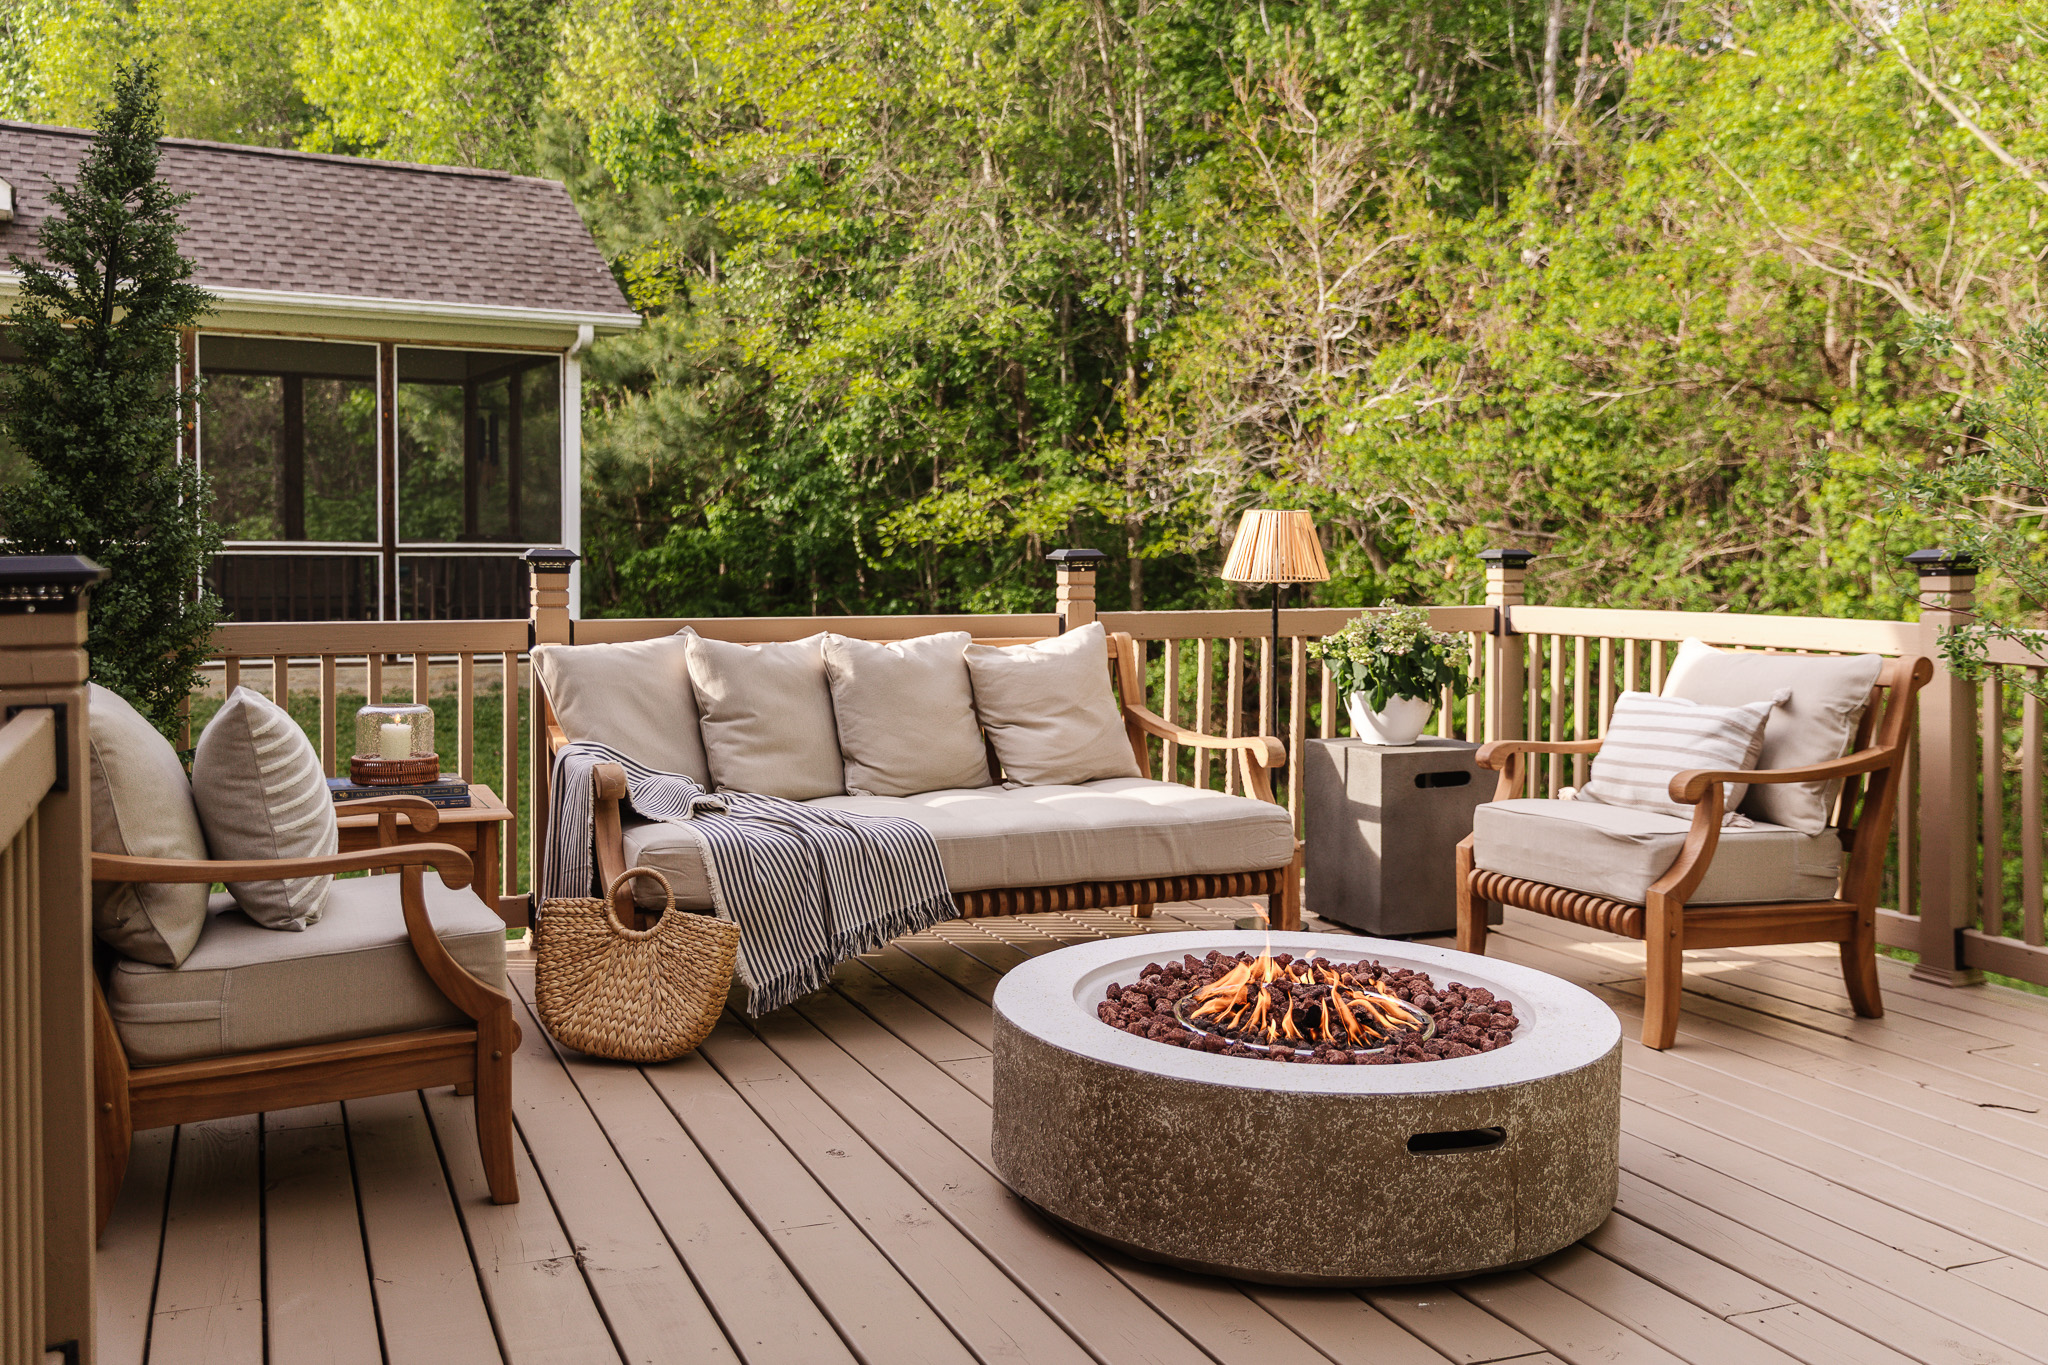
Patio Set (Daybed Only) | End Table | Outdoor Pillow | Outdoor Lumbar Pillow | Fire Pit | Propane Cover Table | Outdoor Solar Floor Lamp
A fire pit was high on our wish list. We wanted one that could sit on the deck, not in-ground. Lowe’s had many options, and we chose one that connects to a propane tank and has a cover that doubles as an end table!

The fire pit does have a connection to the propane tank in the below photo. I’m not ready to make permanent holes in the deck to make it hidden, but that’s coming in a bit!

Faux Tree | End Table | Patio Set (Daybed Only) | Fire Pit
I was concerned about a lack of greenery, so I purchased two faux plants (a boxwood and a cedar) from Lowe’s and supplemented with other plants from a nursery to add life.


When Chris was drawing up the plans, he asked about lighting. I immediately said yes. He suggested post cap lights that automatically turn on at night, which look very finished.
Shop Andi’s Deck
From a hazard zone to our dream outdoor haven, our deck transformation was a journey filled with unexpected twists, helpful friends, and a whole lot of learning. What began with rotten wood and caution tape culminated in a beautiful, extended space perfect for dining, lounging, and making memories.
It’s proof that with a little vision (and a lot of DIY spirit), you can turn even the most daunting home projects into spaces you’ll love for years to come. I’ve already hosted some girl friends over for cookbook club and it was just so magical—backyard entertaining season has just begun!